-
怎样很麻烦的开始做一个个人博客~jekyll
有一种强烈的预感 如果真的是想做一个个人博客的人是不会来翻这篇文章的 当然…不想做的更不来浪费时间 我只是单纯的想…以后的我不要忘了这个漫长的流程
首先 你要有一个充足的时间 比如…一个空闲的下午茶时间 其次 你需要有一个Github账号或者、你有一个已购买的注册域名 一个主机服务器等等…
你应该是不会有那些的
这篇文章很有限的介绍怎样基于Mac环境下在Github上部署一个免费的jeklly博客 Jekyll是什么我也不知道 具体请去官网详查
按照官网的安装教程 你可以将jekyll先下载到本地 你需要打开一个黑色背景的小窗口 它叫‘Terminal’ 也许在你的电脑上它已经改名叫‘iTerm’了
第一步 安装jekyll
gem install jekyll必要时候请 ‘sudo’
sudo gem install jekyll第二步 新建一个jekyll博客
jekyll new my-new-blog第三步…
请到你的新建博客下
cd ~/PATH/my-new-blog/第四步 开启jekyll server
jekyll server --watch不要打小鼓默默碎碎念为什么要加watch 我也不知道…
不加watch在编辑中会有莫名的假bug让你误以为自己总是写错 其实可能只是你需要重新 ‘ctrl+c’ 再 ‘jekyll server’重新开启一下
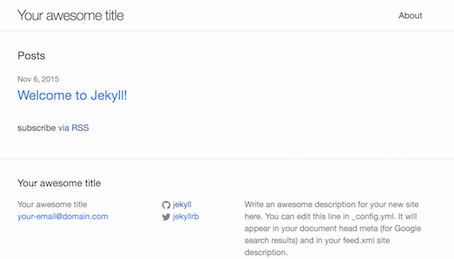
接着你就能在浏览器中的’localhost:4000’看到你的页面了 应该跟下面一样
然后嘛…我们要来先看一下刚刚我们 ‘new’ 的这个jeyll文件夹里面有什么 下面这个就是你的文件夹
├── _config.yml
├── _includes
|   ├── footer.html
|   └── header.html
|   └── head.html
├── _layouts
|   ├── default.html
|   └── post.html
|   └── page.html
├── _posts
|   ├── 20015-10-29-welcome-to-jekyll.markdown
├── _data
|   └── members.yml
├── _sass
|   ├── base.scss
|   └── layout.scss
|   └── syntax-hoghlight.scss
├── _css
|   ├── main.scss
├── _site
├── feed.xml
└── index.html
好,我们先来看一下最基本的‘.yml’配置文件 在这个configuration文件中包含了网页的基本信息 诸如你的网页名称之类的 其中 ‘baseurl’这一项需要特别注意 最后我们上传到Github page上面需要特别注意这一项的设置 在本地时我们不要做修改 将 ‘baseurl’这一项保持
baseurl=""jekyll默认的用liquid template来定义网页界面 我们来看第二和第三个子文件夹 ‘ _includes’ 和 ’ _layout‘ 在’_includes‘中的三个’html‘文件被分别引用安排在页面的不同位置 ‘_layout’中的’html’文件就是用来定义这些界面安排的
接下来你所看到的这个文件夹’ _posts’就是存放所有博客的地方 jekyll用markdown文件来让你专注于写作这件事情 所有在’ _posts’文件夹中的文件都以markdown文件形式存在 而对于你来说 写博客只需要将文字简单的输入完成思想到文字形式的转换就可以了 推荐一个Mac上我比较常用的markdown文本编辑器 ‘Mou’ 当然markdown编辑器还有很多 或许你平时已经习惯于用文本编辑器来写代码 sublime vim也可以作为写博客的好手 只要你去认真搜索一下相关的插件
最后对于这个本地正常运行的静态文件博客 你需要做的也就是添添补补把显示页面变成你喜欢的样子 这些你将以修改’ _sass‘和 ‘_includes’文件夹中的文件来完成 如果你暂时还没有什么做网页的经验那么CSS也就无关紧要了 五搜索一下你想要的页面Template吧 这里有很多别人做好的主题可供下载直接使用
当然 除了很多ruby的插件可以让你的博客完成更多的事情以外 原生的jekyll也提供了一些基本的功能 诸如页面分页pagetination
pagetination的具体官方文档可以在这里 用法相当简单 这是一个可以让你的’index‘主页分页显示你的博客 这时我们需要打开configuration文件也就是开头所讲的 ‘ _config.yml’文件 在该文件后面加上:
gems: [jekyll-paginate]
paginate: 5
paginate_path: "/blog/page:num/"
这里面 ‘paginate: 5’代表了每页显示5个博客 接下来paginate会自行generate出第二页第三页…直到你’ _posts ‘ 文件中的最后一个博客 而所设定的路径也就是 ‘ paginate_path ‘就是生成的第二页第三页的URL地址
接下来你会需要这些代码放在你的’index.html’文件中以便看到paginate的效果
{% if paginator.total_pages > 1 %} <div class="pagination"> {% if paginator.previous_page %} <a href="{{ paginator.previous_page_path | prepend: site.baseurl | replace: '//', '/' }}">« Prev</a> {% else %} <span>« Prev</span> {% endif %} {% for page in (1..paginator.total_pages) %} {% if page == paginator.page %} <em>{{ page }}</em> {% elsif page == 1 %} <a href="{{ paginator.previous_page_path | prepend: site.baseurl | replace: '//', '/' }}">{{ page }}</a> {% else %} <a href="{{ site.paginate_path | prepend: site.baseurl | replace: '//', '/' | replace: ':num', page }}">{{ page }}</a> {% endif %} {% endfor %} {% if paginator.next_page %} <a href="{{ paginator.next_page_path | prepend: site.baseurl | replace: '//', '/' }}">Next »</a> {% else %} <span>Next »</span> {% endif %} </div> {% endif %}以上这些都能在上面的官方文档链接中找到 虽然默认的可能不符合你的审美 但是基本实现了翻页的功能
接下来就可以开始上传到你的Github page上 当然你确实需要一个Github账号 新建一个repository 创建一个新的Github page
重新打开你的’ _config.yml’ 文件将原来空的baseurl换成 ‘ /新建的Github repository地址名字/ ‘ 比如你的Github page的URL为 ‘YOUR_NAMW.github.io/PAGE_NAME/’ 那么你的baseurl在这里就应该是 ’ /PAGE_NAME/‘
将本地的文件上传到你的Github上之后 一切似乎就差不多准备就绪了
最后你就可以开始专注于你的博客了….
好吧、我承认这样实在是太麻烦了 但是…万一你也很感兴趣想做一个可以去看一下 反正也花不了太长的时间
-
Summary on WEEK8
Summary for WEEK8
Hardware Side
The improvements are required for a more flexible and secure purposes of the sensor node. Previously, the cheap solution was to use the Atmel mega 328p as the centre MCU with just 32K programming memary and 2k SRAM. For the crypto engine, the quarz frequency should be raised to a certain amount which now is 32MHz and with 384kB programming memory Atmel chip XMEGA384C3. The 64-pin TQFP package was again used for this MCU chip as the design size scale. The basic design in draft is presented below:
The new schematic of PCB is complated according to the reference design from offical Atmel Xmega C series manual. There are few things different which only fit into the modular application solution Nquiringminds demands.
The printing 3D box
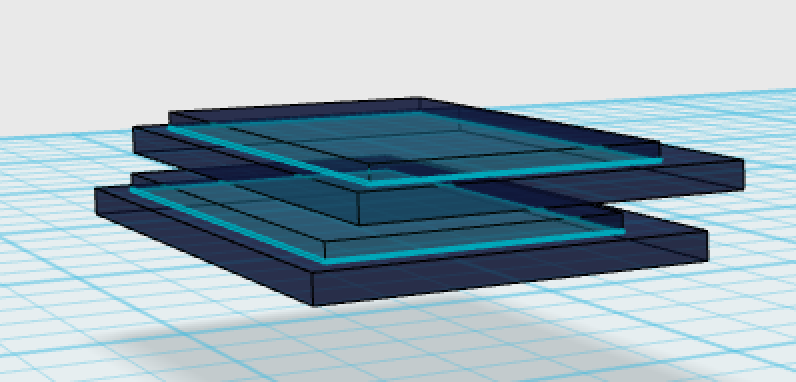
There are many changes to previous design, basically the cube design is now transfer to the all stackable design instead. The issue is quite complicated with the cube design as there is a risk putting all the modules together along with the power module as well as RF module. The spacing could be the sensitive issue in terms of the attenna and the battery which should go beneath the main MCU module. The design thinking of this modular sensor node had been changed a lot in terms of the usability and different senarios. The image below shows the brief magenetic connection between each identical sensor boxes which could stack together.
Software Side
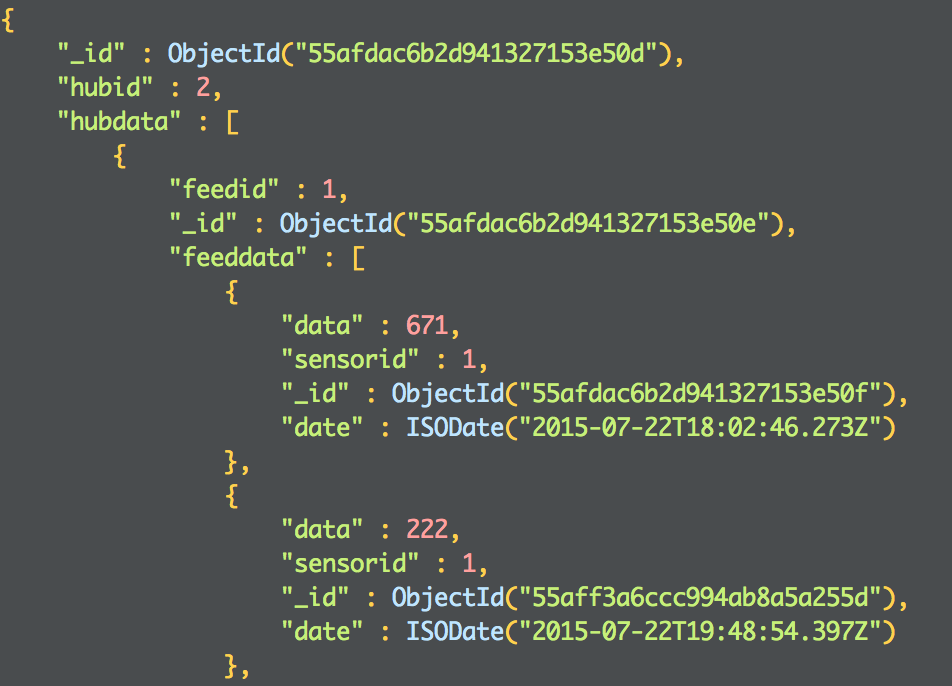
The simple HTTP RESTful server is about to be finished but a lot more are to be modified. There is a failure to add the user athorization on top of the visualization sensor data. It is believed that the issue is happened because of users holding the mongodb collection. Currently, the data sent from each sensor node through the hub stations are storeed in the mongodb using embedded documents with arrays:
The things are to be working on following weeks:
- The dissertation writting
- The further development of software side for the HTTP RESTful server
- The hardware design is finished for complating the MSc project
- For the company, the hardware design needs to be continued with more researches on voltage regulators and finish the PCB routing.
-
Summary on WEEK6
Summary for WEEK6
Software Side
Because of waiting the manufacture delivering the PCB, there is no design actually related to hardware expect for the discussions on the final products. In order to build a flexible solution for most of the cases the company is going to work on, the main MCU board keeps simple but complicated with different tiny components. For example, the voltage regulator or the battery charger just in case the application solution needs different output voltage for the sensors. The “LEGO” design is believed to be like a extendable pcb board with four sides or maybe to form as a cube with 6 faces. The software side didn’t go well because of not succeeding on streaming the data like a “server awareness” system. The solution was to simply put a AJAX funciton which does the refresh automatically for every 5 second. The difficulty was mainly the data model, the design is basically as shown below:

Feed data is generally the data for each different sensor station while the node data is for each different sensors. The idea is that data is stored in nested documents and arrays as JSON format. The users’ authetication information would be added on top of this.